
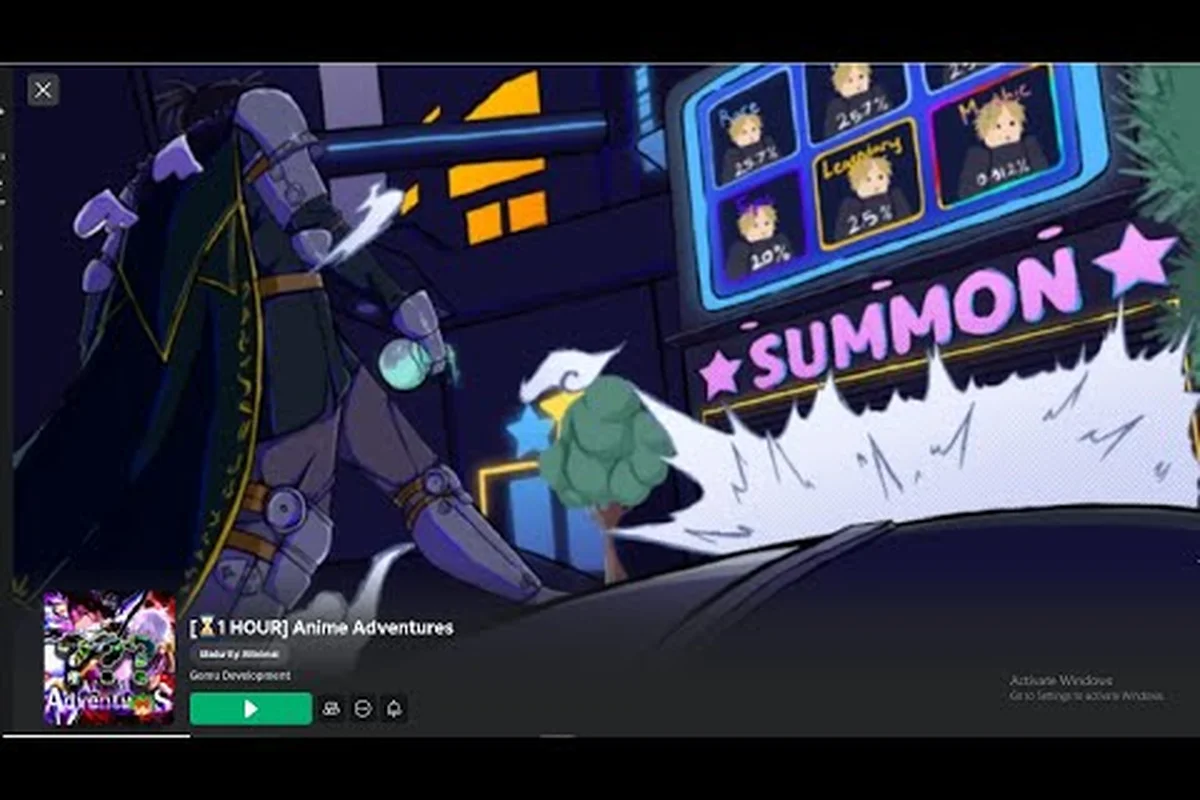
The anime adventures first hour guide matters because early placement, upgrades, and gem decisions shape your first squad before harder content appears. Build a stable damage core, clear the opening waves, and learn where each activity fits without wasting resources.
Your Anime Adventures First Hour Plan
Your first session should move from summoning to a working team, then from team testing to efficient content unlocks. The official Anime Adventures game page describes a Roblox tower-defense game by Gomu Development where players collect characters, level units, unlock abilities, and defend against waves. That foundation makes placement and timing more important than a complicated opening plan.
The sequence below uses the official Anime Adventures game page for confirmed mechanics and community reports only for observed behavior. It avoids invented level thresholds, drop rates, damage values, summoning probabilities, and tier lists, none of which Gomu Development has published for the reviewed version; where the source is uncertain, treat the claim as a testable observation rather than a guaranteed result.
| First-hour phase | Main goal | Resources to protect |
|---|---|---|
| Early session | Summon a usable roster and identify one dependable damage unit | Gems |
| Opening waves | Learn placement, targeting, and ability timing | Gems and summon currency |
| Early progression | Level the main damage unit and test squad roles | Upgrade materials |
| Content unlock | Clear the first dungeon, then evaluate a raid | Gems and items |
| Session review | Keep only decisions supported by the results you saw | Rare summons and upgrades |
Start With a Clear Squad Role
Summoning produces the roster, but an early squad should be organized around purpose rather than rarity alone. Community mentions identify Rukia and Fusion Vegeto, although the reviewed sources do not establish a complete verified roster. Treat those names as examples of characters players have discussed, not as guaranteed recommendations or a numbered tier list.
Look for a main damage unit, then add units that make that unit easier to protect. The official game page says characters can be leveled to unlock abilities, so a unit that cannot contribute enough damage to finish a wave will not make the team feel stronger simply because it occupies a slot.
Use this practical checklist during your opening pulls: first secure one reliable main damage unit, then choose support or defensive characters that increase its survivability. For example, if two candidates deal similar opening-wave damage, prioritize the one whose ability can be unlocked through a lower leveling path, because spare ability levels can be redirected into progression resources. After your first summon, review the roster for a damage dealer, a unit that eases defense, and a flexible slot for wave coverage; this keeps early Story Mode clears focused while leaving room to adapt when a stage introduces tougher enemies.
-
Summon until you have more than one workable option instead of spending every gem on the first result.
-
Test each promising character through the same early wave so comparisons are meaningful.
-
Keep one clear damage source in the main lineup, even if another character has better visual appeal.
-
Reserve flexible slots for units that handle a different part of the wave.
-
Level the unit carrying your runs before spreading resources across every character.
This approach follows the progression community guides describe: summon a roster, settle on one main damage unit, clear the opening story waves, and then evolve the unit that carries progression. Community coverage also mentions Evolution, Starfruit, Relic, Gem, and Limit Break systems, although their exact level requirements and effect values are not officially published.
Read the Wave Instead of Spamming Upgrades
The earliest lesson is that a tower-defense fight is a sequence of decisions. A unit can look strong on the roster screen and still underperform when enemies arrive in an unfavorable order. The official page identifies the game as a wave-based tower-defense experience, and beginner community videos frame the first session around learning placement and wave timing.
Watch where enemies begin moving, which route they take, and whether threats bunch together. Place your main damage source where it can contribute for more than a brief moment. If a different unit covers a specific stretch better, change that unit without abandoning your entire formation. A flexible arrangement usually teaches you more than a rigid “one correct board” claim.
| Combat observation | Practical response | Why it matters |
|---|---|---|
| Damage is too low across the whole wave | Focus upgrades on the main damage unit | It improves the unit that determines whether the wave ends |
| One section of the map is overwhelmed | Reposition or replace a support unit | Better placement can improve coverage without new summons |
| A unit performs poorly on one route | Test it on another route | Some characters may fit specific patterns better |
| The same squad feels inconsistent | Compare timings and ability order | Inconsistent results often reflect execution rather than roster quality |
| You cannot identify the best unit | Run controlled comparisons | Identical conditions make the decision more useful |
Make the First Upgrade Decision
Early upgrades should produce visible improvement in your next fight, not merely raise a number on a menu. Level the main damage unit first, then improve a teammate whose role supports it. Community guides identify leveling and ability unlocking as central progression layers, but they do not provide a dependable level cap or stat breakpoint to memorize.
Before spending, ask three practical questions about the exact upgrade, the bottleneck it addresses, and when you can verify the result. For example, if your main damage unit lacks ability unlocks, prioritize those before adding a support unit that will not increase wave-clear speed. Treat gems as a limited progression resource during the first hour, and delay a unit pull until you can compare its role with your current team and test it in Infinite Mode, a dungeon, or a raid.
-
Does this upgrade change the unit that contributes most to finishing waves?
-
Does it solve a problem I actually encountered, such as weak coverage or slow damage?
-
Can I test the result immediately in the next wave or activity?
If the answer to any question is no, save the resource. The official page mentions gems and a limited unit awarded upon release, so conserving gems can matter. It also states that returning players missing those items should receive them upon release, but that promise does not make early spending automatic or necessary.
Anime Adventures Damage Guide for Early Decisions
This anime adventures damage guide focuses on improving results with information you can observe. It does not invent percentages, attack ranges, level caps, or unit-specific values because no reviewed official source publishes them. A player-friendly damage check should measure whether the squad can survive long enough for its damage to matter.
Compare Roles, Not Colored Labels
Rarity labels visible on official thumbnails include Rare and Legendary, while community guides also use Mythic, Secret, and Limited. A color or label can help organize the roster, but it cannot tell you how a unit performs in your formation. The reviewed sources do not provide enough verified data for a complete rarity ranking.
During the first hour, divide your roster by what each character actually does in combat rather than by rarity. For example, place a high-damage unit such as a main attacker in the front slot, keep a secondary damage dealer on a separate route, and reserve support characters for positions where their ability can affect more allies. If a character’s role changes after leveling, test that unit again instead of assuming its original label still applies.
-
Primary damage: The unit that most often contributes to ending the wave.
-
Secondary damage: A backup or specialist that handles another route or enemy pattern.
-
Support: A unit that improves the rest of the squad, although exact support effects must be checked in-game.
-
Undecided: A character without a clear role in the current squad.
| Test | Controlled comparison | Useful conclusion |
|---|---|---|
| Main damage test | Same map, wave, and placement pattern | Which character carries the most damage |
| Survival test | Same squad with one position changed | Which placement protects the team better |
| Ability test | Ability used at comparable moments | Which timing produces the clearest improvement |
| Support test | Add or remove one support unit | Whether that unit changes the squad’s performance |
| Resource test | Upgrade one core unit at a time | Which investment improves results fastest |
Official game information confirms that leveling unlocks abilities, but it does not quantify those abilities. Therefore, judge each unit by observable performance in the current version. Player reports can suggest ideas, yet they are not a substitute for testing because updates may change unit behavior.
Use a Damage Log Without Inventing Numbers
You do not need private server data or unsupported damage calculators to improve. Record short, consistent notes after each attempt: where you placed the main damage unit, when its ability became available, which route caused the most trouble, and whether the squad lost the wave before or after damage improved.
| Note category | Record this | Avoid this |
|---|---|---|
| Formation | Main unit position and route | Copying a unit placement without seeing the map |
| Timing | When the ability was used | Claiming one universal timing rule |
| Result | What improved after the change | Inventing exact damage numbers |
| Resources | What was spent and why | Assuming a rare unit is always better |
| Confidence | One clear observation | Turning a community report into official fact |
A useful early log answers one narrow question: “What should I try next?” If enemies gathered near a corner, test a unit that covers that area. If the team lacked time to finish the wave, compare the main damage unit with another candidate under the same conditions. This creates a repeatable loop without pretending that a community estimate equals official data.
Know When to Evolve
Community guides place Evolution after the opening waves and toward the end of a unit’s development, but they do not supply a universal evolution requirement. Wait until the chosen damage unit has shown enough value to justify concentrating resources on it.
Before committing to Evolution, run a practical three-part check: verify that the unit is already included in the intended team, confirm that its normal attacks have demonstrated a distinct damage role, and make sure the Evolution option is accessible in the current interface. During the first hour, this prevents an early Evolution choice from distracting from urgent unit upgrades, dungeon progress, or first-clear rewards.
-
The unit is already part of the team you expect to use.
-
Its regular performance has established a clear role.
-
Evolution is available through the current interface without ignoring a more urgent upgrade.
The broader progression sequence adds Relic and Limit Break after the core squad is functioning. Those systems may become important later, but the reviewed sources provide no confirmed thresholds. Open them as progression unlocks arrive, inspect their effects in the game, and avoid treating community terms as a checklist with exact milestone numbers.
Anime Adventures How to Play Infinite Mode
Infinite Mode is the natural place to turn placement knowledge into a repeatable survival plan. Community guides discuss it as a progression layer after the basic roster and opening waves. The official page does not publish a rules summary, wave count, reward table, or score formula for the mode, so the safest strategy is to learn the loop directly from each attempt.
Learn One Full Survival Loop
Watch the interface for the current objectives, then identify what changes between rounds. A strong Infinite Mode setup often comes from understanding when the current wave strengthens, where enemies cluster, and which portion of your formation fails first. Do not assume the mode mirrors Story Mode exactly, because community coverage describes it as a separate progression layer.
Use this sequence for each run: complete one ordinary Infinite Mode wave, then use the next wave as a controlled test of a single formation change. Record the wave reached, the first enemy group that caused trouble, and whether the issue was inadequate damage or insufficient survival time. This comparison keeps a single-unit or single-timing adjustment from creating a new problem elsewhere, while preserving a clear baseline for the first hour.
-
Start with your established core: Begin with the team that clears ordinary waves reliably.
-
Read the opening pattern: Note the first dangerous group and the route it uses before changing anything.
-
Change one element at a time: Move a unit, adjust timing, or test a replacement, but avoid editing the whole board after every loss.
-
Identify the first bottleneck: Separate insufficient damage from a formation that cannot survive long enough.
-
Protect useful resources: Do not spend rare or limited resources merely because a run looks close.
For a broader look at the mode, use the Anime Adventures Infinite Mode guide to organize its goals and progression context. The available first-hour advice remains straightforward: make one controlled adjustment, observe the result, and keep the change only if it improves the run.
Read the Failure Point
A defeat contains more information when you classify its cause. If the squad is removed before it can deal meaningful damage, increasing raw damage may not solve the immediate problem. If the team survives but the wave never ends, the answer may be different.
| Failure point | Likely area to test | Change to try |
|---|---|---|
| Team disappears near one route | Placement and coverage | Move a defender or redirect the main damage unit |
| Core damage unit stops acting | Survival and ability timing | Preserve the unit and change when the ability is used |
| Damage seems spread too thin | Main damage focus | Concentrate upgrades on the established core unit |
| Early rounds work, later rounds fail | Scaling preparation | Test a different unit before the difficult section |
| Losses feel random | Inconsistent execution | Repeat the same setup and record the result |
Do not invent a stage count or call a particular point the “correct” wave. Instead, label the first point where your formation stops working. This label gives you a practical next test and keeps the anime adventures how to play infinite mode advice based on the actual run in front of you.
Your First Dungeon and Raid Priorities
Community resources identify Dungeons and Raids as later progression layers, making them a natural goal after the first squad handles opening waves. However, the reviewed official page does not provide exact requirements, reward amounts, level thresholds, or drop rates for either activity. Approach the unlock as a test of squad readiness rather than a guaranteed reward milestone.
Use the Anime Adventures First Dungeon Guide Approach
The anime adventures first dungeon guide should begin with preparation, not an unverified required level. Confirm that your main damage unit is leveled, your formation clears the early game reliably, and your inventory contains enough support for one complete attempt.
| Preparation check | Ready signal | Action if not ready |
|---|---|---|
| Main damage | Produces dependable wave damage | Test or level another candidate |
| Survival | Core survives long enough to act | Adjust positions or unit roles |
| Ability timing | Ability is used in a useful window | Practice it on easier waves |
| Resource plan | Rare items are not being spent casually | Save until a real need appears |
| Activity readiness | Unlock requirements are visible in-game | Complete the displayed objective |
Your first dungeon is also a good place to learn the anime adventures first dungeon guide principle of matching a unit to an environment. Some characters may cover a route better than they handled the opening map. Keep the change experimental, because community mentions of Rukia and Fusion Vegeto do not provide verified dungeon rankings or map-specific performance data.
For longer-term resource planning, the Anime Adventures Farming Guide can help separate routine farming decisions from the limited resources you want to keep for progression. During your first hour, reserve rare drops and high-rarity materials for a confirmed progression need—such as upgrading the main damage unit, improving survival, or unlocking a required Story Mode objective—instead of spending them on repeated early-dungeon clears. This creates a clearer split between materials for immediate readiness and resources saved for later Infinite Mode or raid preparation.
Treat the Anime Adventures First Raid Guide as a Team Check
The anime adventures first raid guide should focus on whether your squad has complementary roles, enough coverage, and a stable damage core. A raid is not the place to improvise with an unfinished roster. Return to earlier waves or dungeons if your core unit cannot reliably finish ordinary encounters.
| Raid-readiness signal | What it indicates | Best response |
|---|---|---|
| One unit carries nearly all damage | Limited redundancy | Test a secondary damage source |
| Two units occupy similar roles | Wasted coverage | Compare their route performance |
| Abilities are used at random | Wasted opportunity | Practice a repeatable timing pattern |
| The formation only works on one map | Low tactical flexibility | Test another route or activity |
| Resources disappear after one attempt | Weak resource plan | Preserve items until the lineup is stable |
Raid rewards and event maps should be checked inside the game or through confirmed announcements, not assumed from community chatter. The Anime Adventures Raid Guide provides a focused reference for organizing that activity once the basic squad is ready.
First-Session Checklist for New Accounts
The first hour is most productive when every major action produces a clear decision. The Anime Adventures Infinite Mode Gems reference can help when you are weighing an early gem expenditure against saving resources for Infinite Mode or future progression.
Use this checklist to finish with a stable plan rather than a half-spent inventory: compare each candidate unit’s role and damage in the same opening wave, then spend only the gems needed to level the unit you will actually place in your main formation. For example, if a damage dealer clears three practice waves but the tank cannot survive the next pack, prioritize the formation and ability timing before another summon; that keeps your next Infinite Mode or dungeon attempt better funded without locking you into an unproven roster.
- Summon a small pool of possible units without exhausting every gem.
- Identify one dependable main damage unit through consistent wave tests.
- Level the main damage unit before spreading resources evenly.
- Learn where enemies travel and when your most useful ability should be used.
- Test the squad in several opening waves instead of one easy encounter.
- Check the first dungeon when its displayed requirements are met.
- Evaluate a raid only with a team whose roles are clear.
- Record one change to test next session and one resource category to conserve.
The key is not to finish the hour with the largest roster possible. Finish with a damage unit you understand, a formation that survives its target waves, and enough gems to make your next choice intentionally. As community reports consistently suggest, the strongest beginner progression comes from learning placement and wave timing before spending every resource, while official information supports leveling units, unlocking abilities, and building a squad.
Frequently Asked Questions
What should I focus on during my first hour in Anime Adventures?
Focus on summoning several options, identifying one main damage unit, and learning placement and ability timing. Level the unit that carries your waves instead of spreading resources across every character. Clear the opening content, then check the displayed requirements for a first dungeon or raid. This approach follows the progression sequence supported by official information and community reports without relying on invented thresholds.
Should I spend all my gems early in Anime Adventures?
No. Beginner community guides recommend learning placement and wave timing before spending every gem. Save when you lack a clear target, a tested benefit, or enough information about the upgrade. The official page mentions gems and a limited unit awarded upon release, so preserving resources may be useful, although it does not publish a fixed spending plan.
How do I improve damage without a damage calculator?
Compare units under the same conditions and observe which one contributes most to ending the wave. Test placement, ability timing, and upgrade priority one change at a time. Focus upgrades on the established main damage unit. Since official damage values and stat breakpoints are not published, in-game comparisons are more reliable than unsupported exact numbers.
When should I try a dungeon or raid as a beginner?
Try a dungeon when your main damage unit already clears ordinary waves and the game shows that the activity is available. Use a raid as a broader team check after your roles and formation are stable. If either activity exposes a weak core unit, return to earlier content and improve that unit before risking valuable resources.
What should I learn first in Infinite Mode?
Learn the current mode’s objectives and the first point where your setup fails. Watch enemy routes, identify whether the problem is damage or survival, and change only one element between attempts. Keep a clear victory condition, because the reviewed official source does not publish a fixed wave count, scoring formula, or reward table for Infinite Mode.